Enrol learners in training via filedrop (Spreadsheet Upload)
This guide will walk you through the process of enrolling learners into training courses using a spreadsheet file upload. By following these steps, you can efficiently add multiple learners at once, map data fields, and resolve any data inconsistencies. Whether you're working with CSV or Excel formats, this process ensures smooth bulk enrolment and accurate data validation.
Video walkthrough
1. Prepare Your Spreadsheet
1.1 Include Required Columns
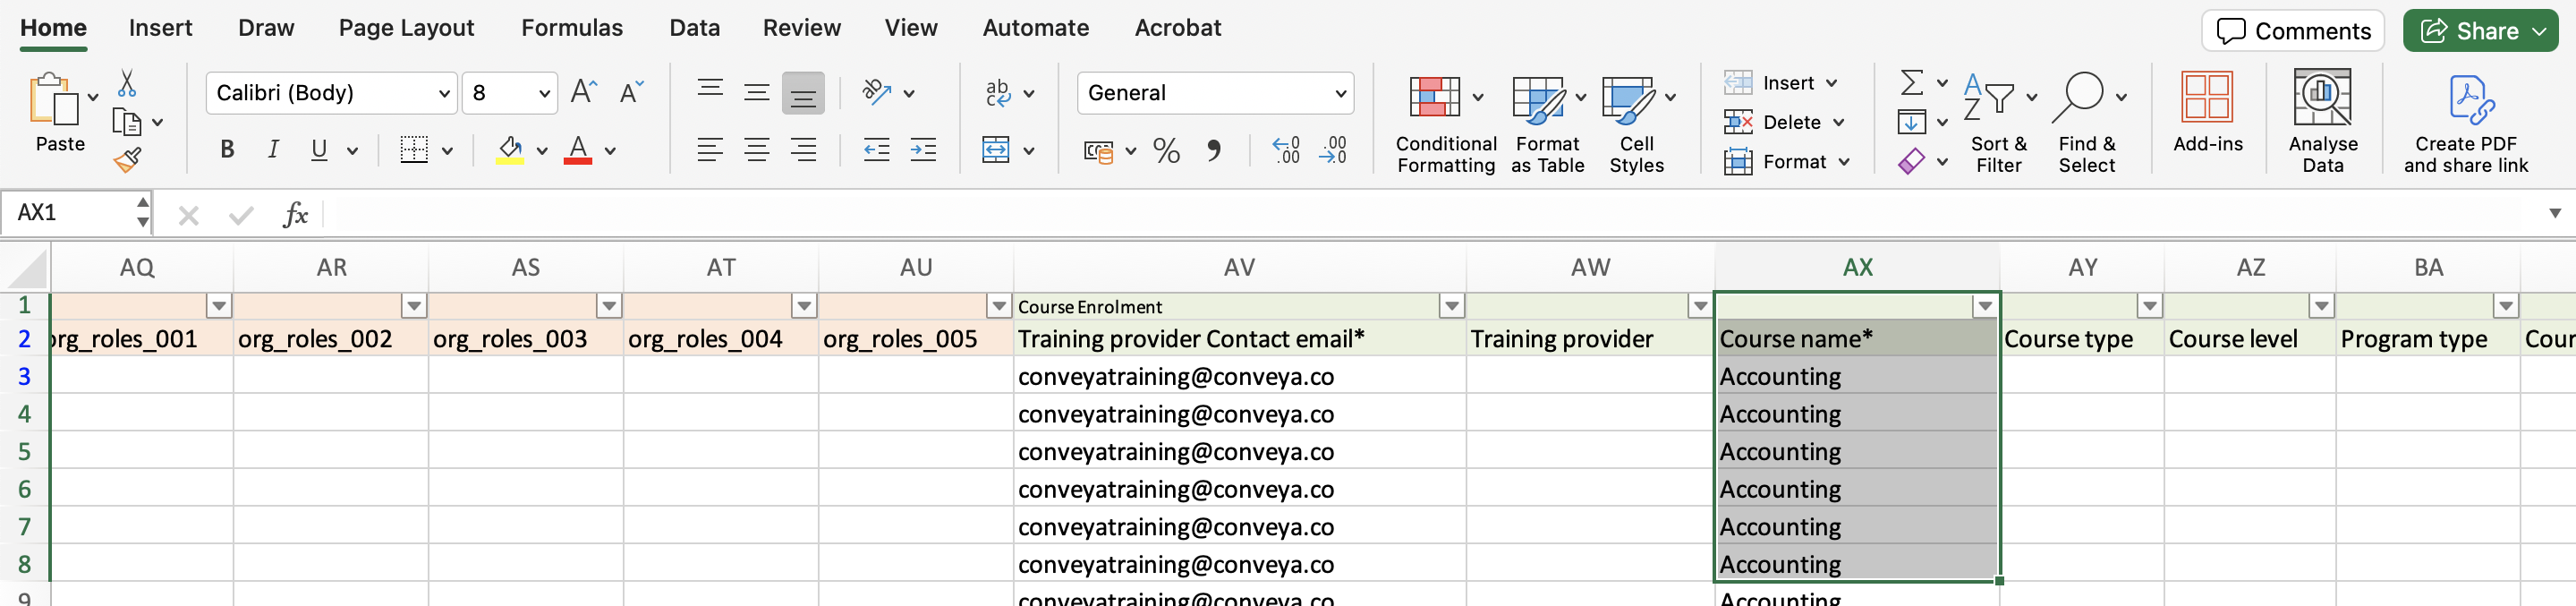
Ensure your spreadsheet contains the following columns:
- First Name
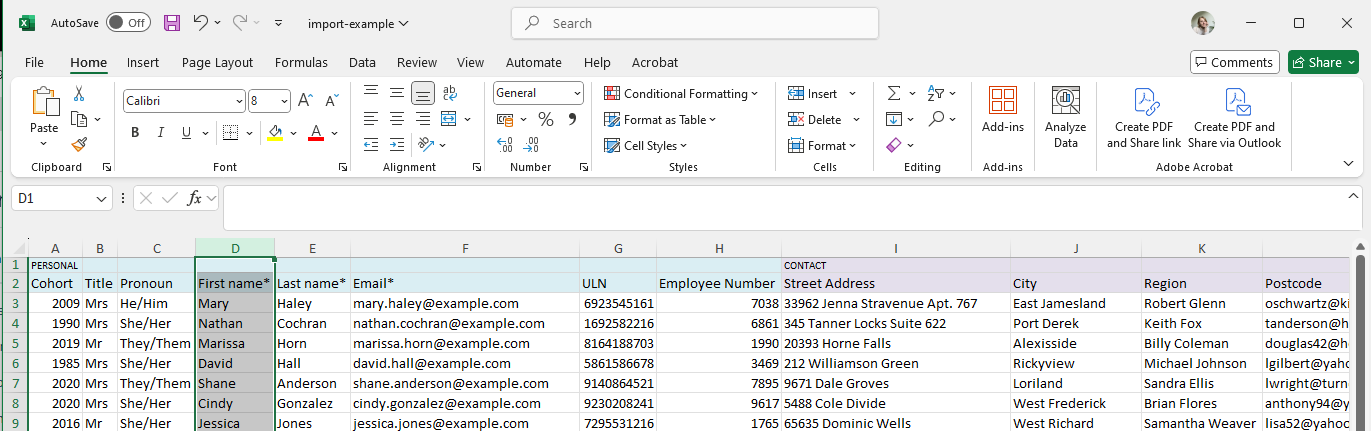
- Last Name
- Unique Learner Number (ULN)
- Training Provider contact email
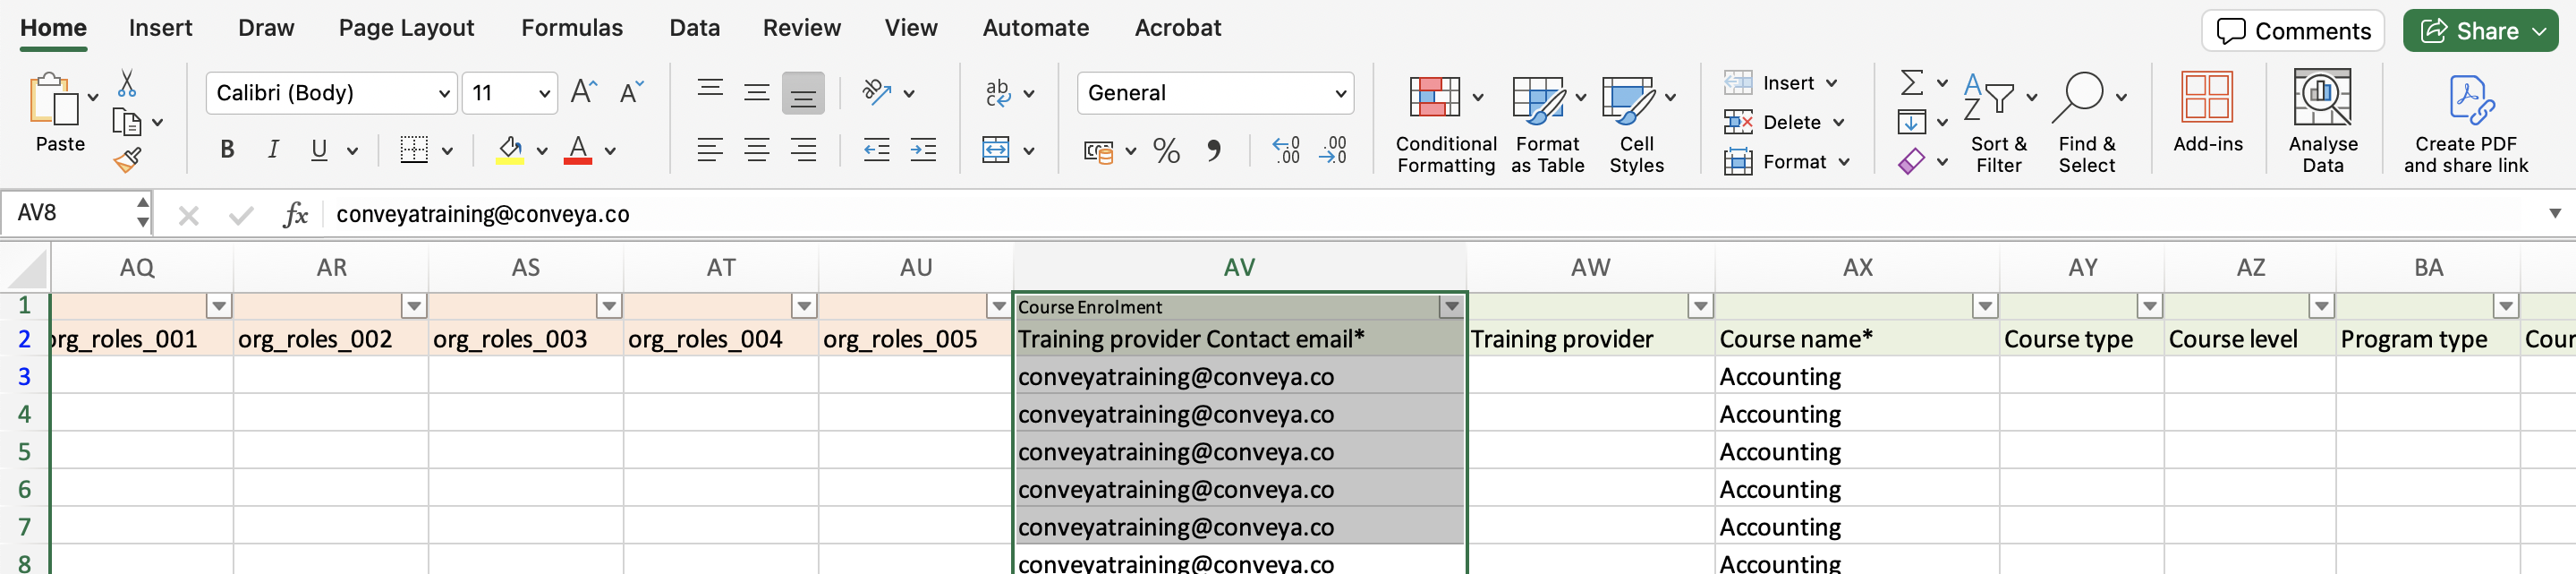
- Course Name
1.2 Choose the Correct File Format
Your file should be in one of the following formats:
- CSV (Comma-Separated Values)
- XLS (Excel Spreadsheet)
1.3 Add Learners
Ensure all learners you want to enrol are included in your spreadsheet.
📁 To speed up the process, download our template here.
2. Navigate and Upload Your File
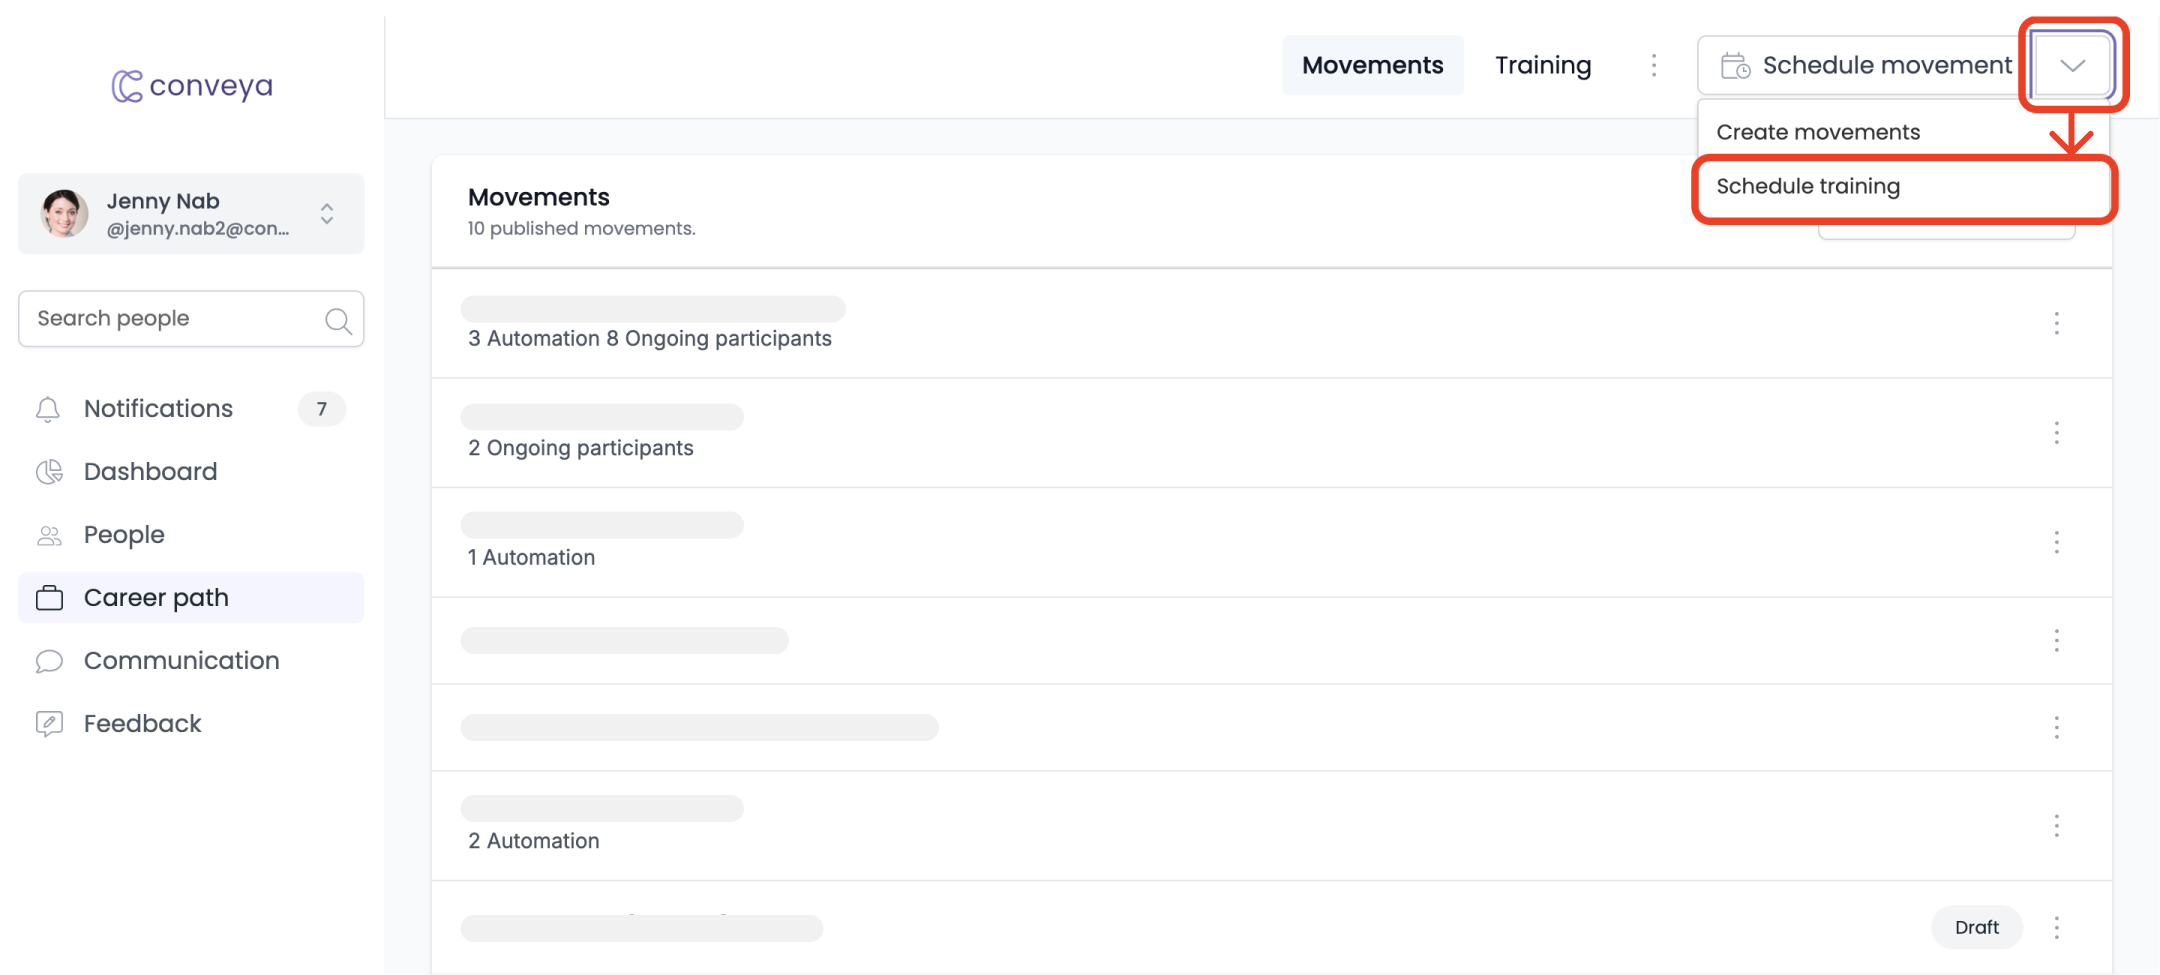
- In the main navigation bar, select the Career Path section.

- In the top navigation, click the arrow next to Schedule Movement.
- Select Schedule Training. A slide-over menu will appear with options to manually enrol learners or use a file drop.
- Ensure Enrol using filedrop is selected.
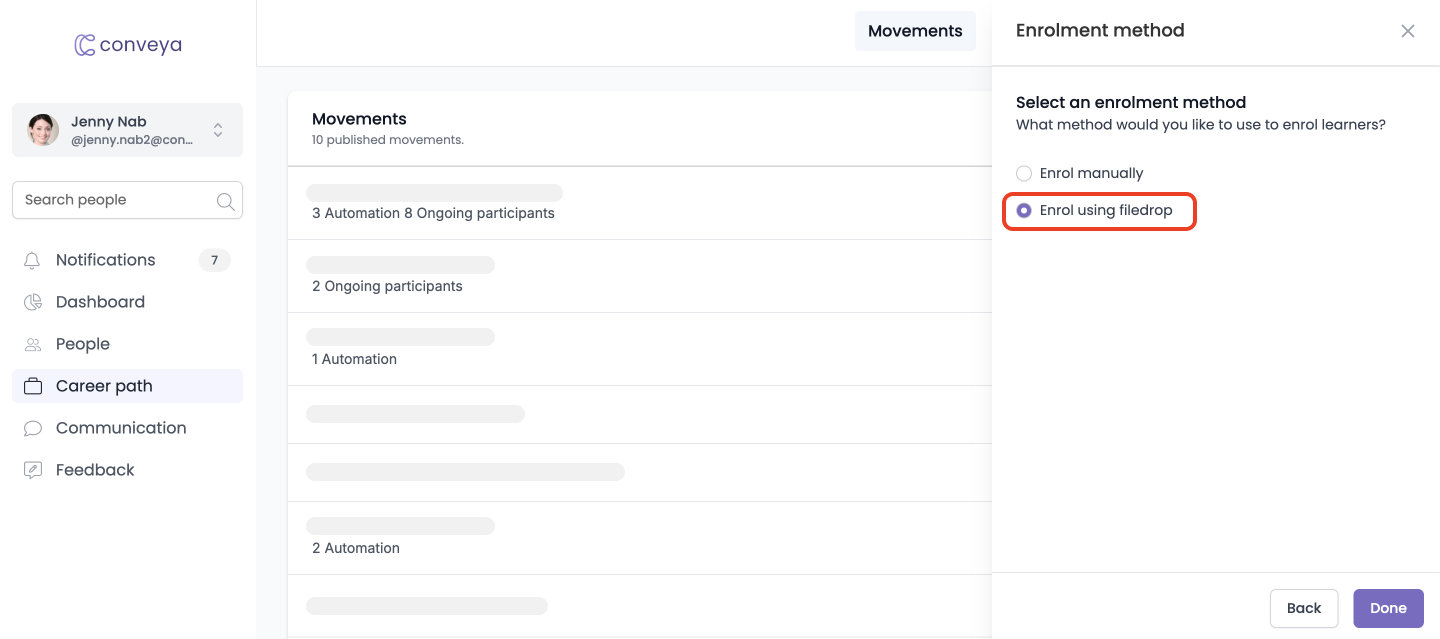
- Click Done to confirm.
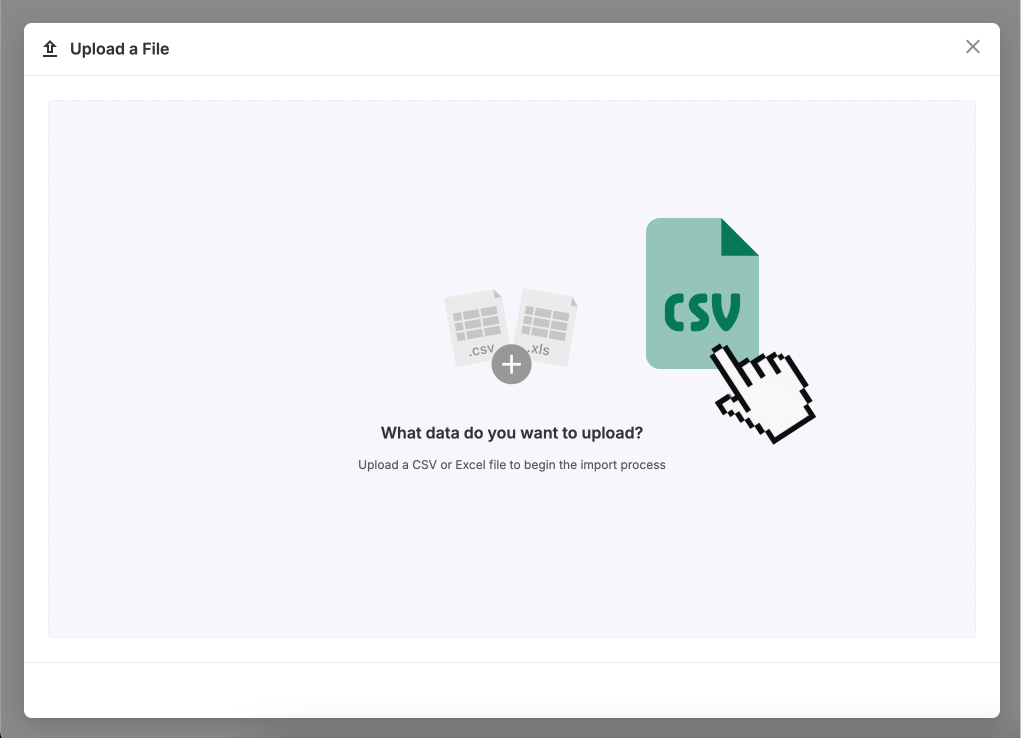
- Drag and drop your spreadsheet into the upload area or click to manually select your file.
3. Select the Header Row
3.1 Identify Header Row
If prompted, select the row in your spreadsheet that contains the column headers.
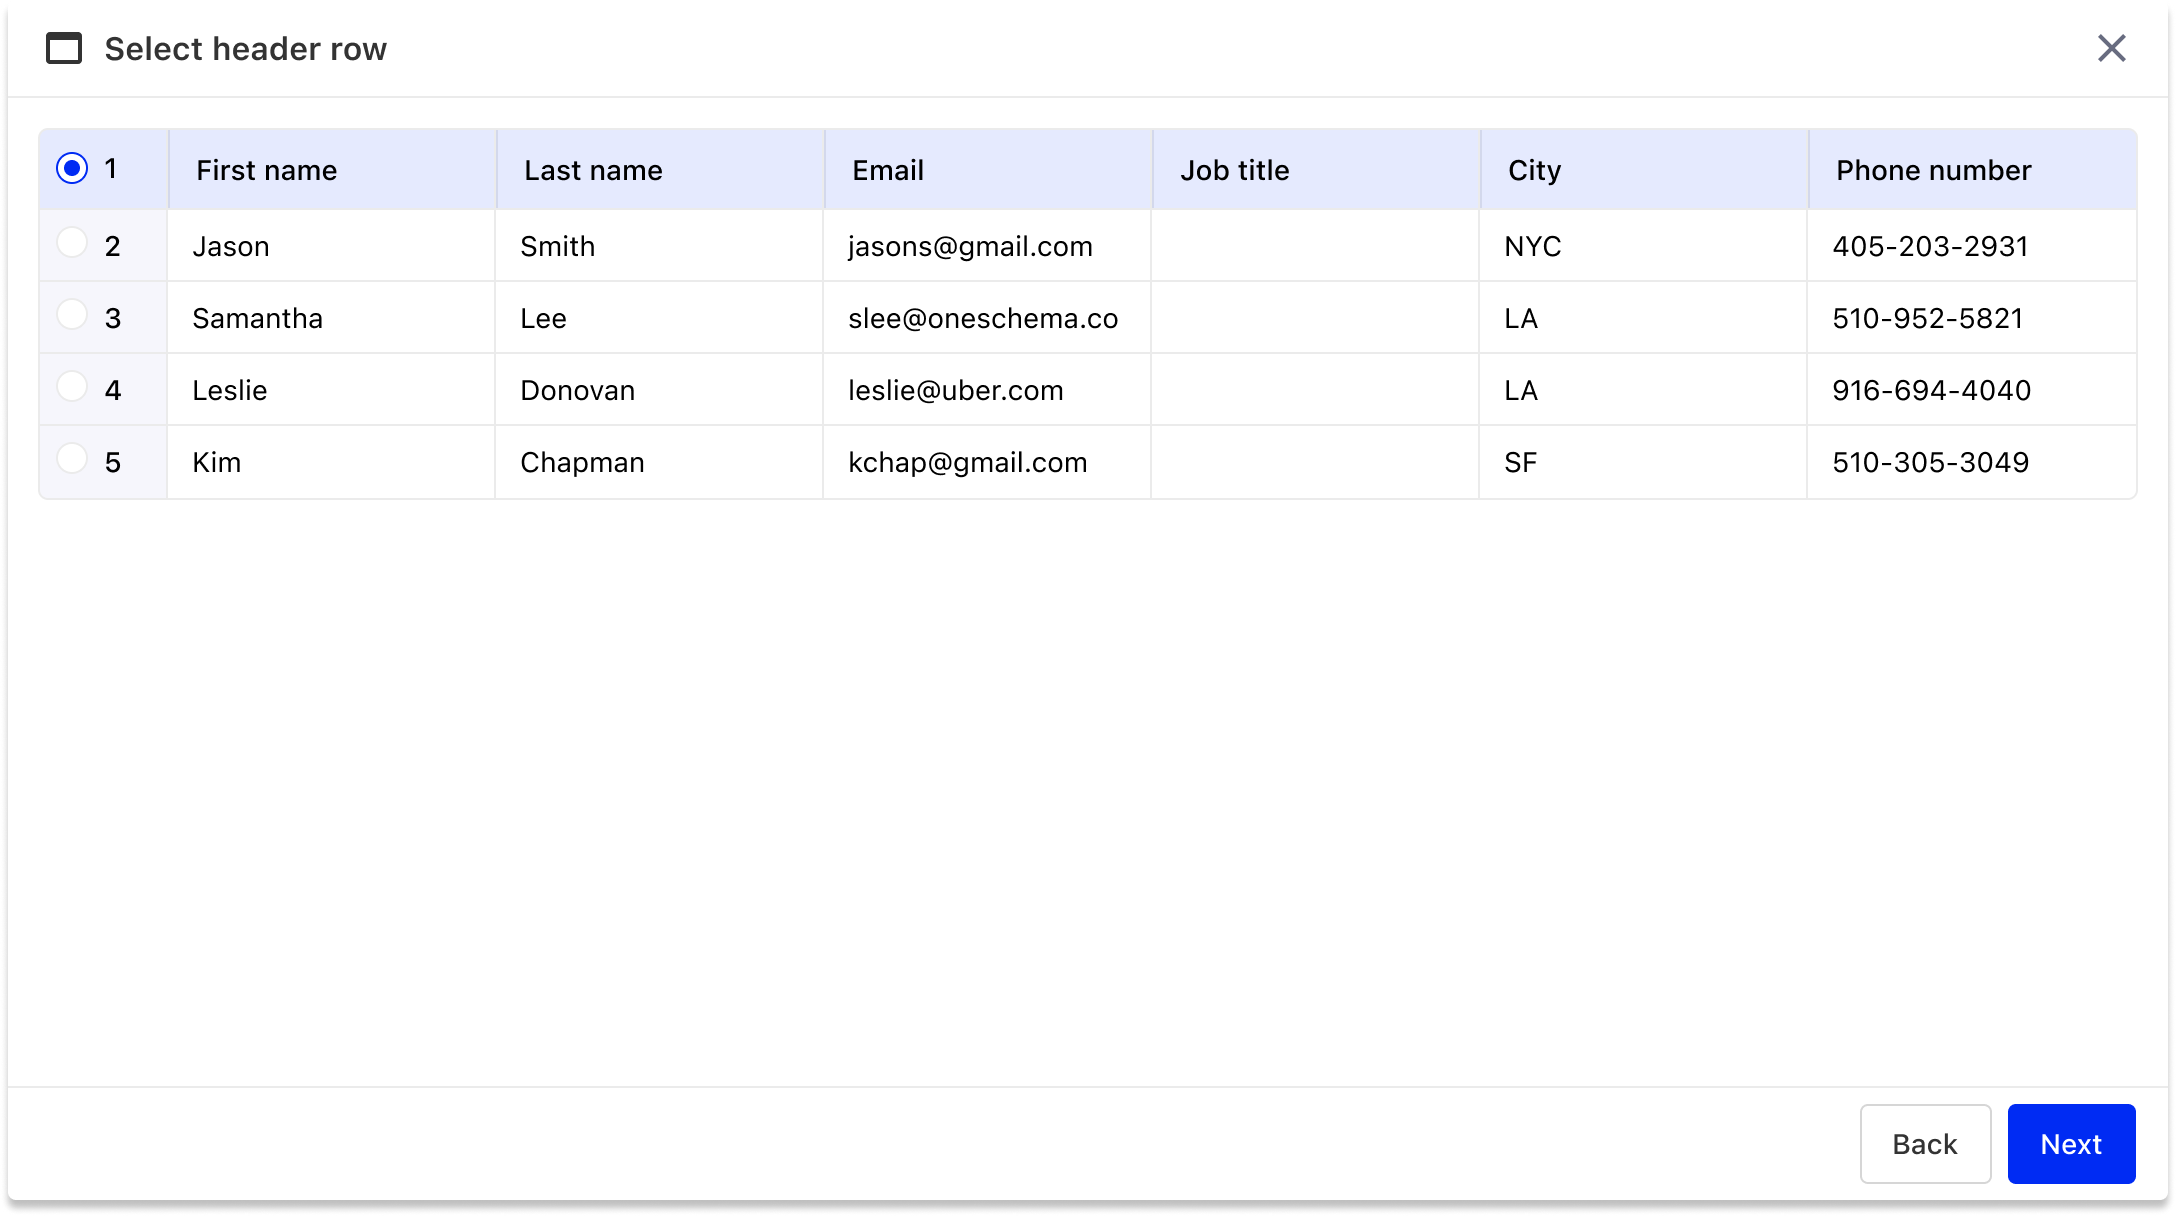
- Click on the correct row to help with mapping the data.
- Click Next to continue.
4. Map Columns
4.1 Match Template Columns
On the Map Columns screen, match the columns from your spreadsheet with the system’s available columns.
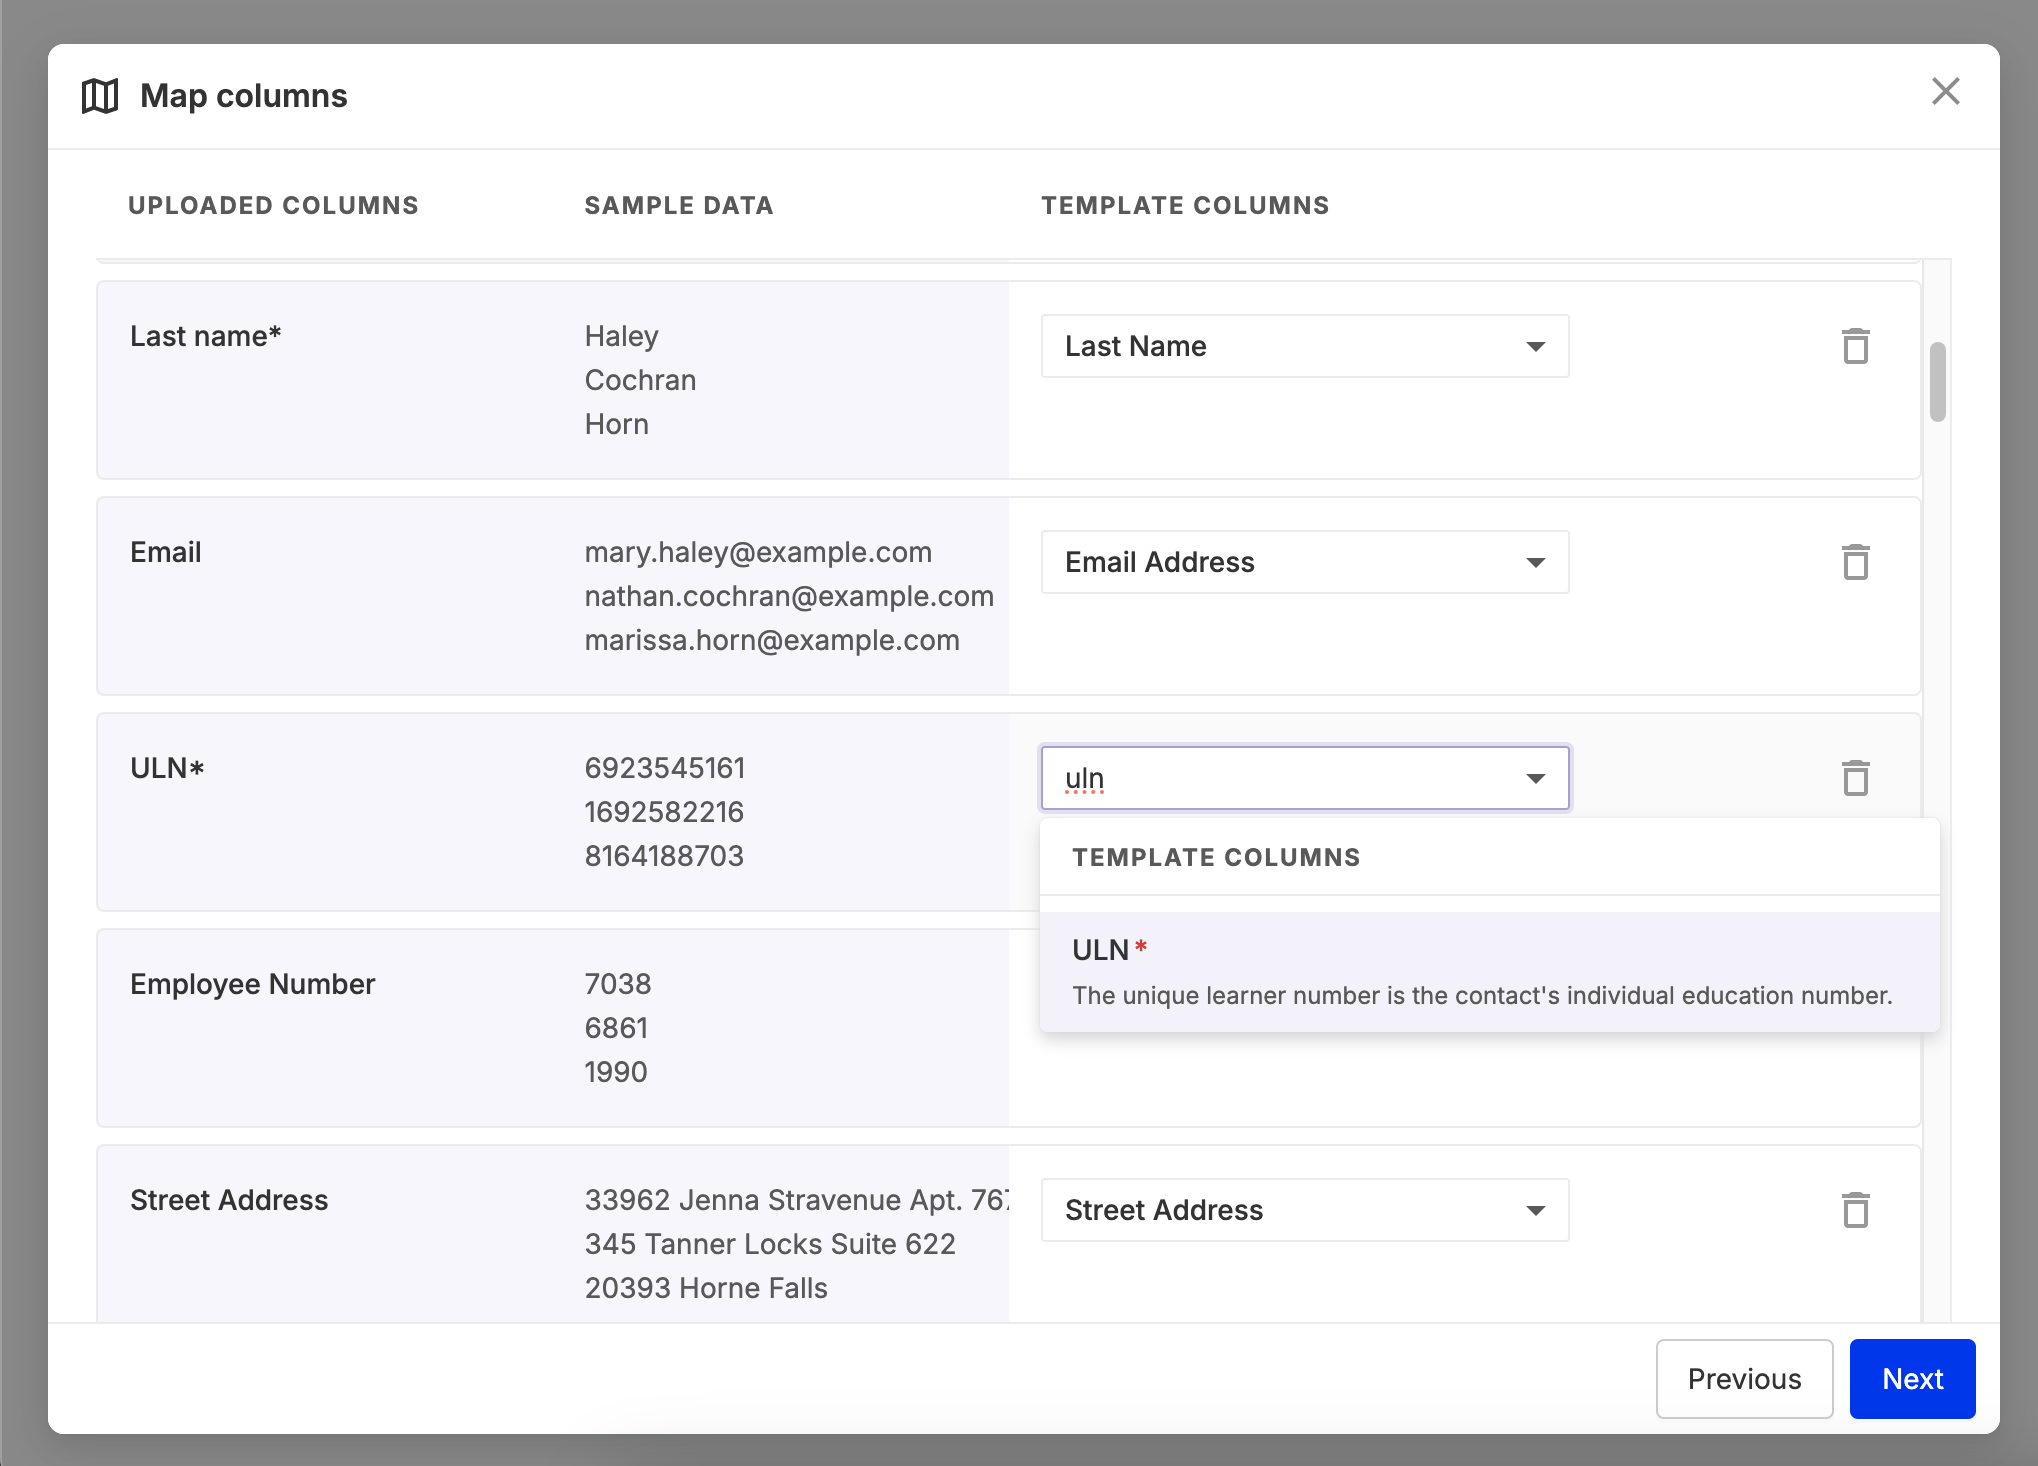
- The system will automatically match columns with exact text matches.
- If manual mapping is needed, align each column from your spreadsheet to the appropriate field in Conveya.
- Click Next to proceed.
5. Validate Formats and Start Import
5.1 Validate File Formats
Ensure all data formats are correct. The system will automatically check for any format inconsistencies or missing data points.
5.2 Begin the Import
Click Import to start the upload process. The system will begin processing the file.
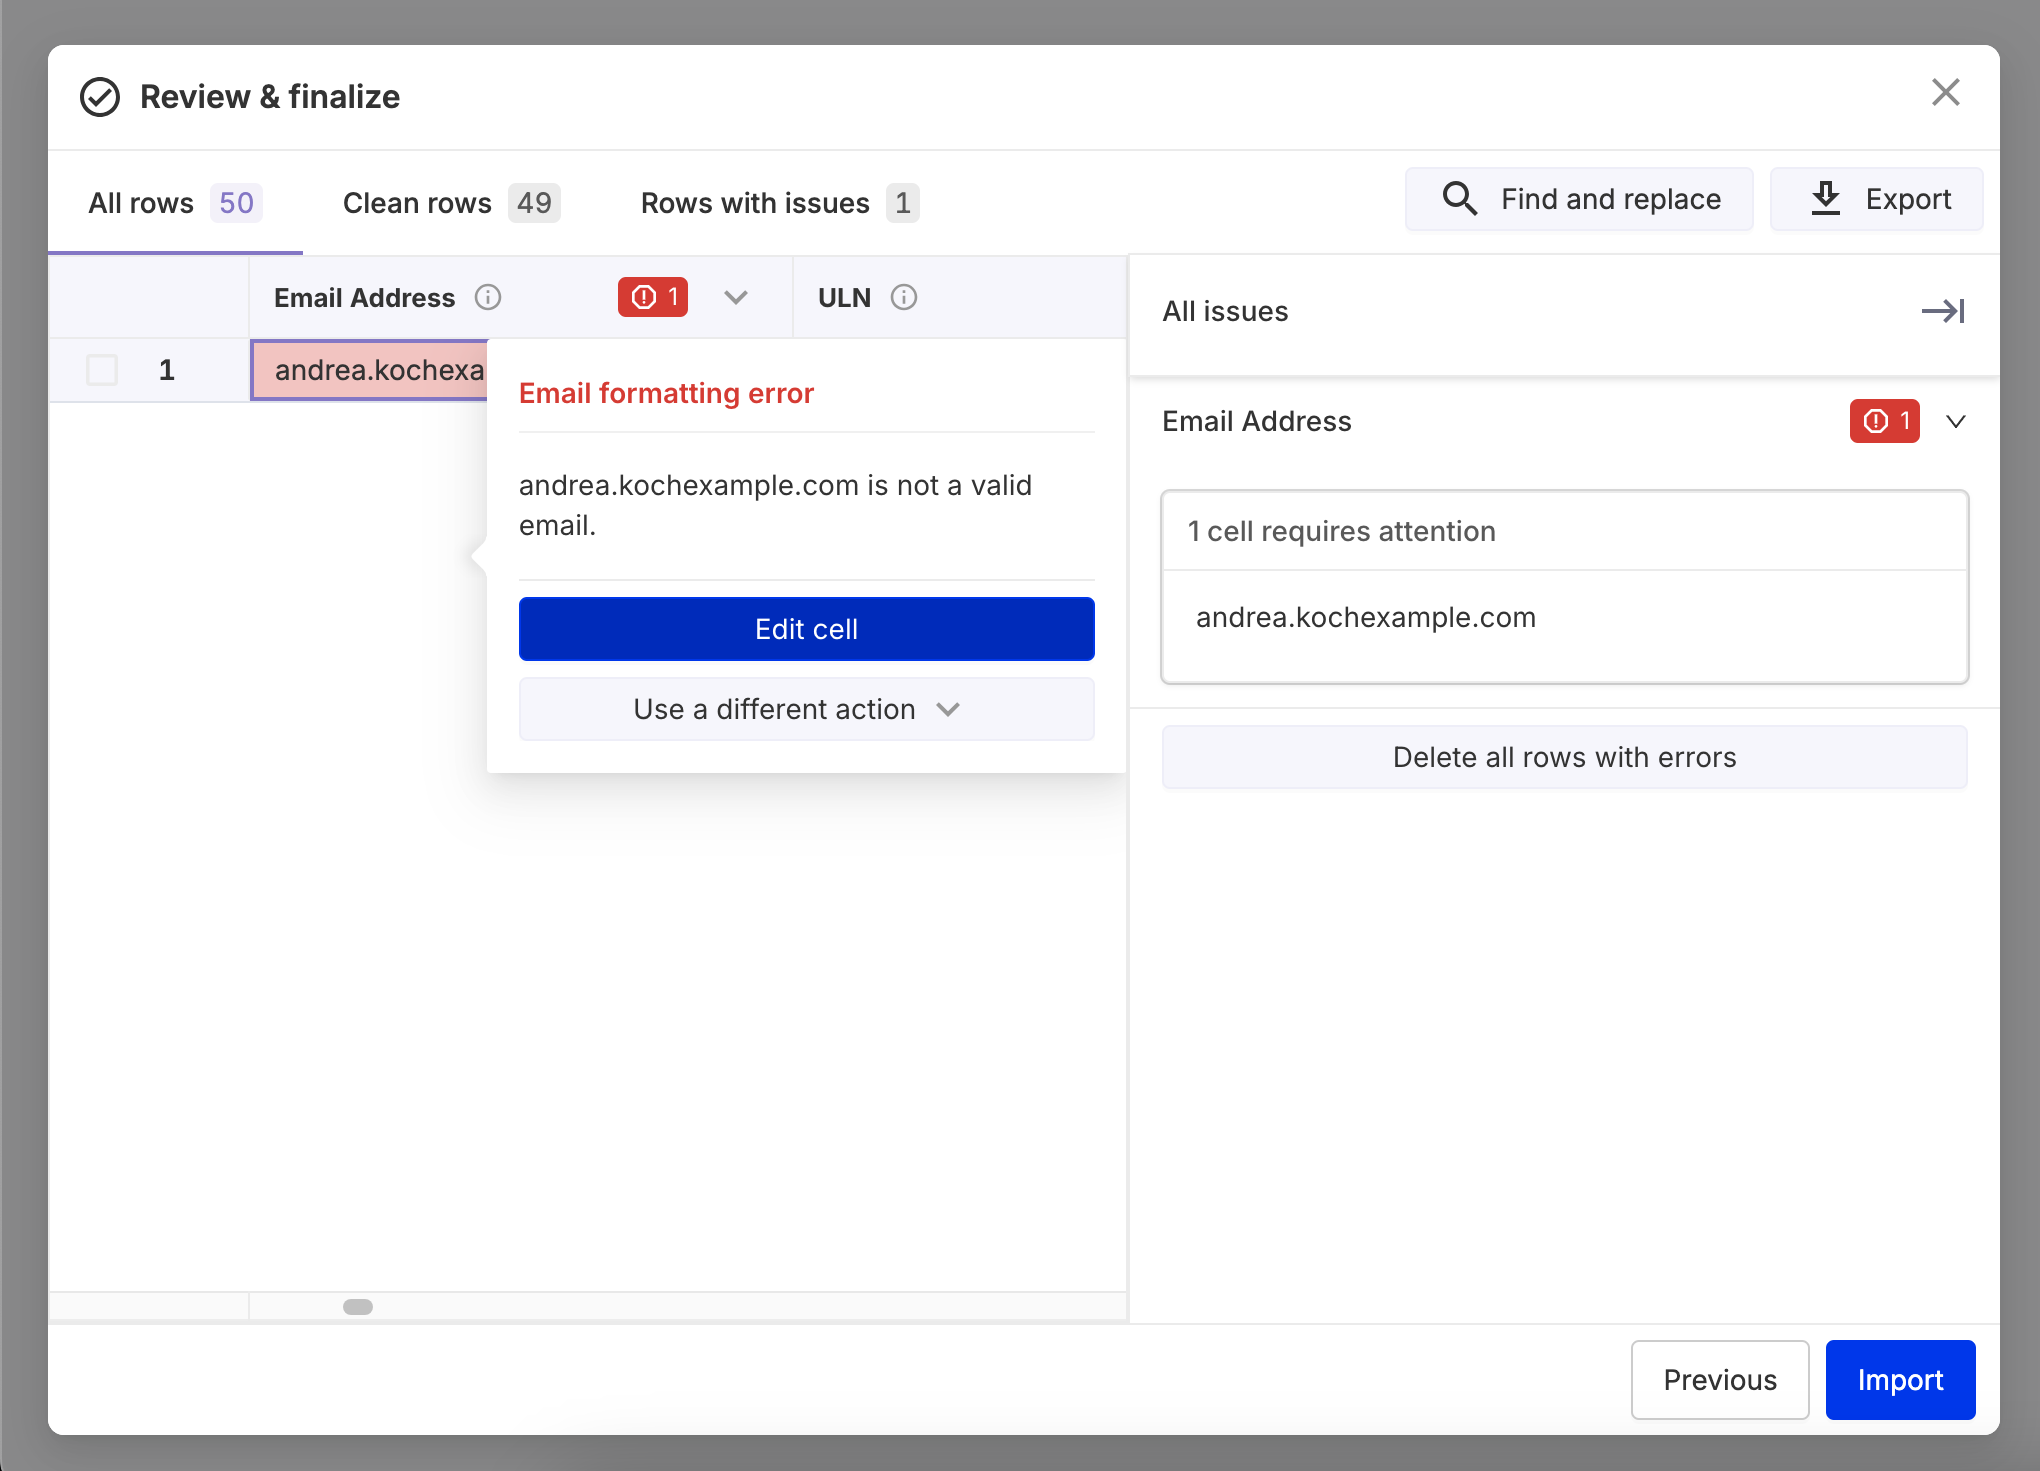
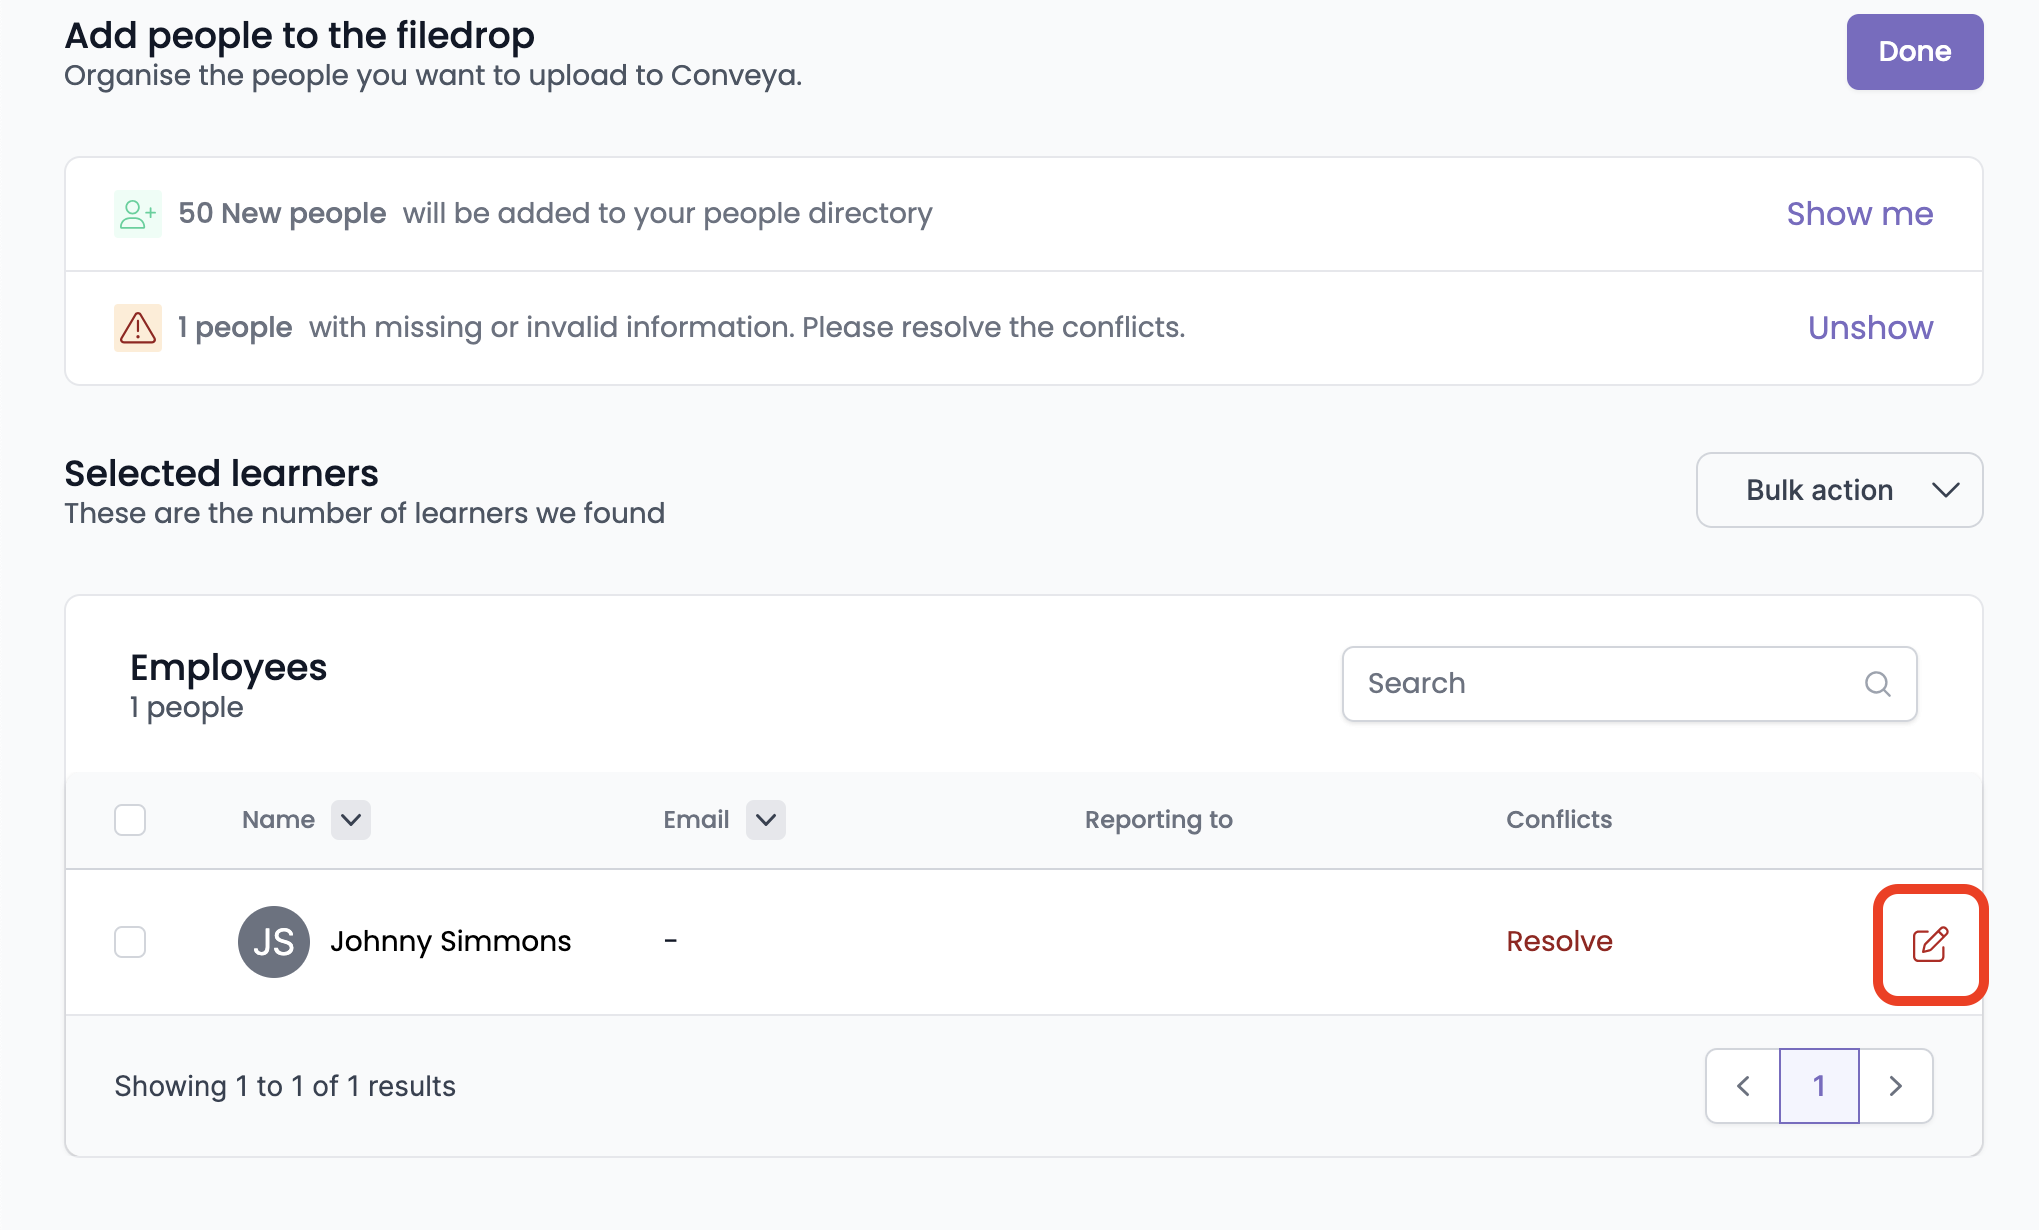
6. Review and Resolve Issues
6.1 Data Validation
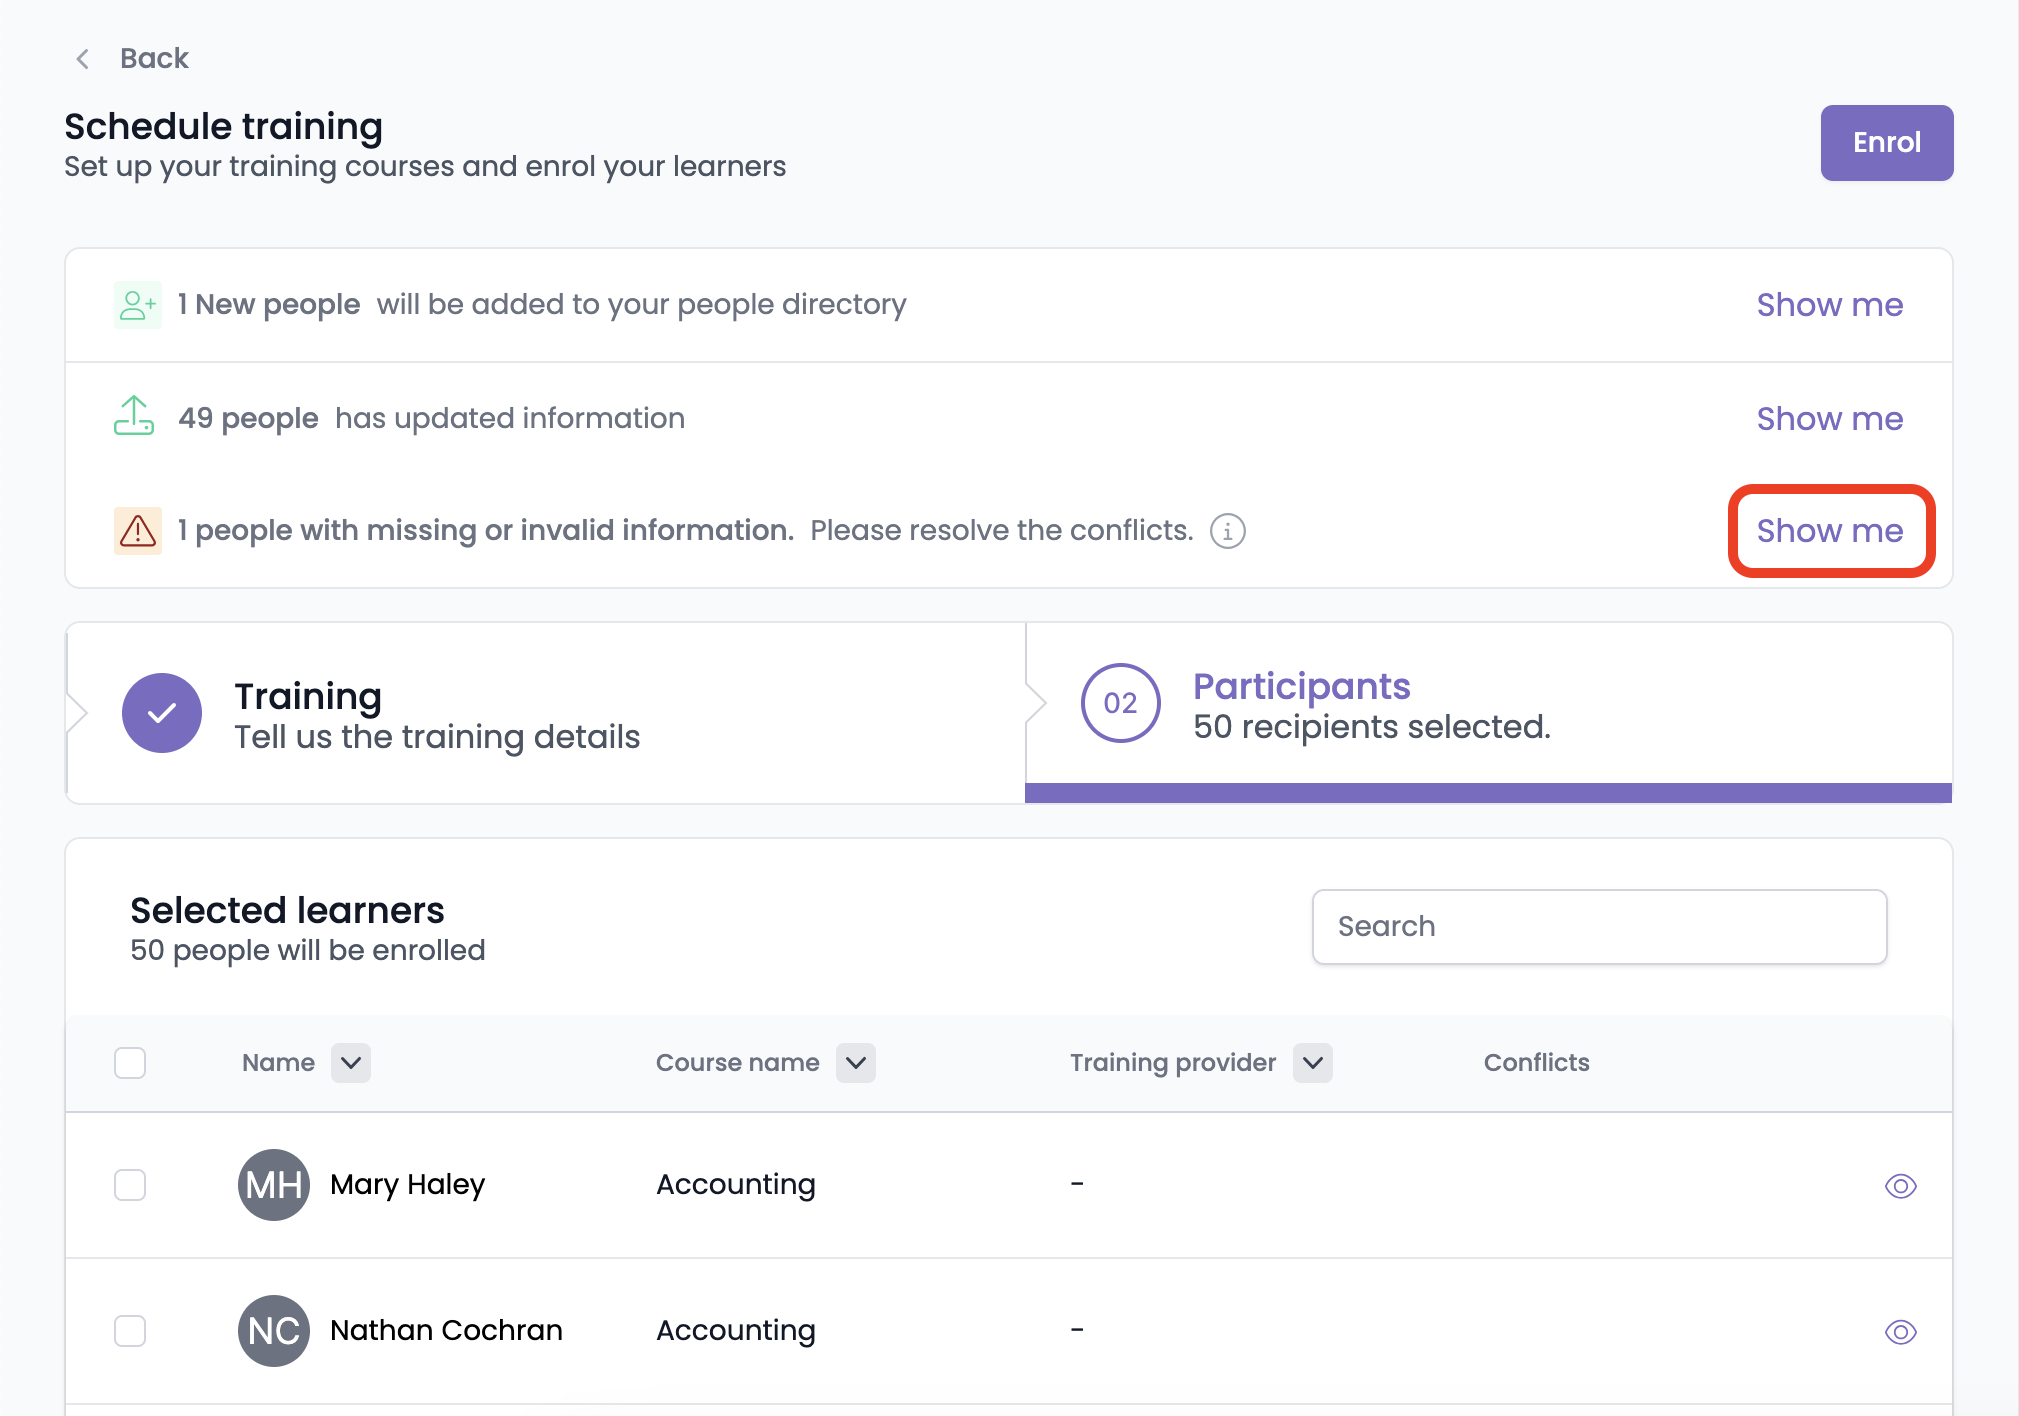
The system will automatically check for any errors or logical inconsistencies. If there are unrecognised course entries or training providers, you’ll be prompted to:
- Match unrecognised courses with existing ones or create a new course.
- For unrecognised training providers, select an existing contact or create a new one by providing the training provider’s name and contact details.
- If any date conflicts or missing data points are detected, click Show Me to view and resolve them.
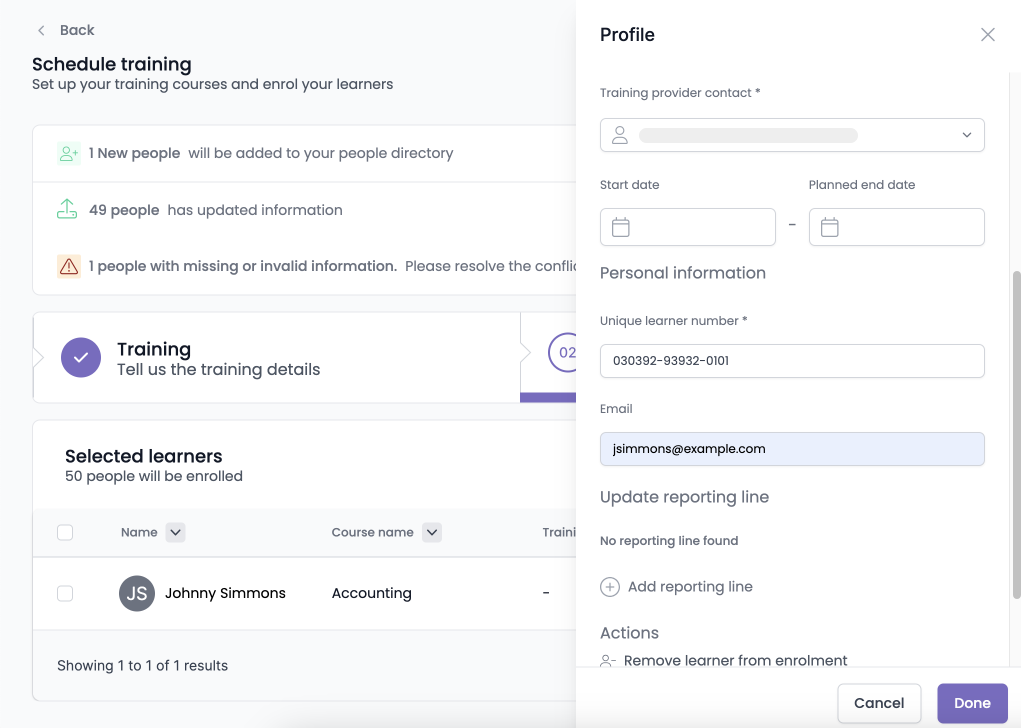
6.2 Resolve Data Issues
Click Resolve to fix any identified issues.
-

Viewing conflicts that needs to be resolved Make the necessary corrections directly within the system.

7. Finalise the Enrolment
7.1 Complete the Upload
After resolving any issues, press Enrol to finish the upload process.
- Your learners are now enrolled.
ℹ️ Note: The enrolment process isn’t fully completed until you press Done. This final step confirms your data review and completion of the process. For further assistance, contact our support team.
FAQs:
Q: Do you have an example of a spreadsheet I can upload people and enrol people into training?
A. For sure! You Can Download It Here
Q: Can I track the status of enrolments and invitations to training providers?
A: Yes, the platform should provide status updates for both learner enrolments and training provider invitations, allowing you to follow up as needed. You can see all this in the course directory as mentioned in the "Getting started with training" article.
Q: How do I change the manager or supervisor associated with a learner?
A: When uploading a sheet, if you need to update a learner’s manager, supervisor, or other roles, simply enter the new email in the relevant field(s). The information will automatically update when the sheet is uploaded.