Scheduling a movement and enrolling learners
In this article, we will walk you through the steps to schedule an existing movement, select a movement manager, and add participants. This article also explains how to review and adjust automations, manage overlapping dates, and finalise your movement scheduling.
Step by step guide
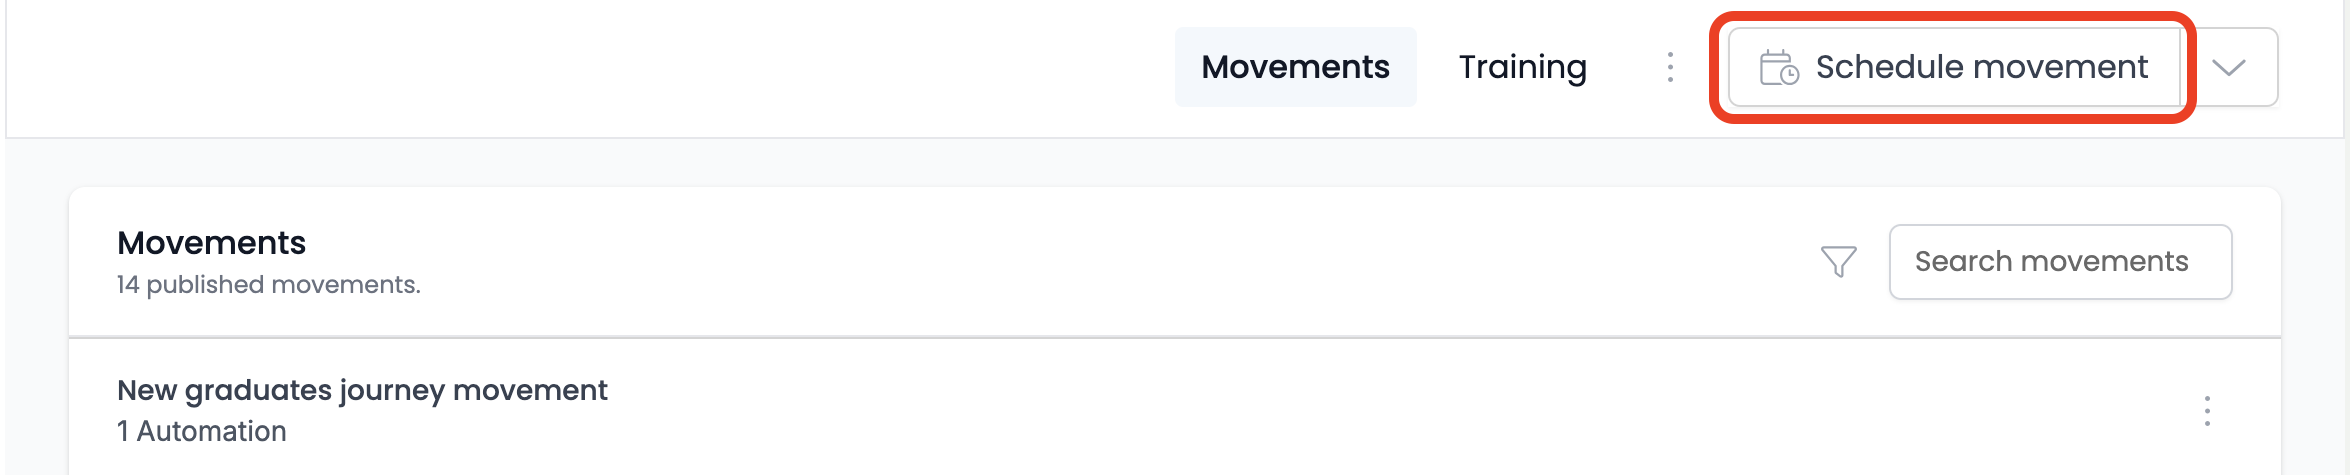
- Navigate to the career path section using the sidebar menu.
- At the top right of the page, click ‘Schedule movement’
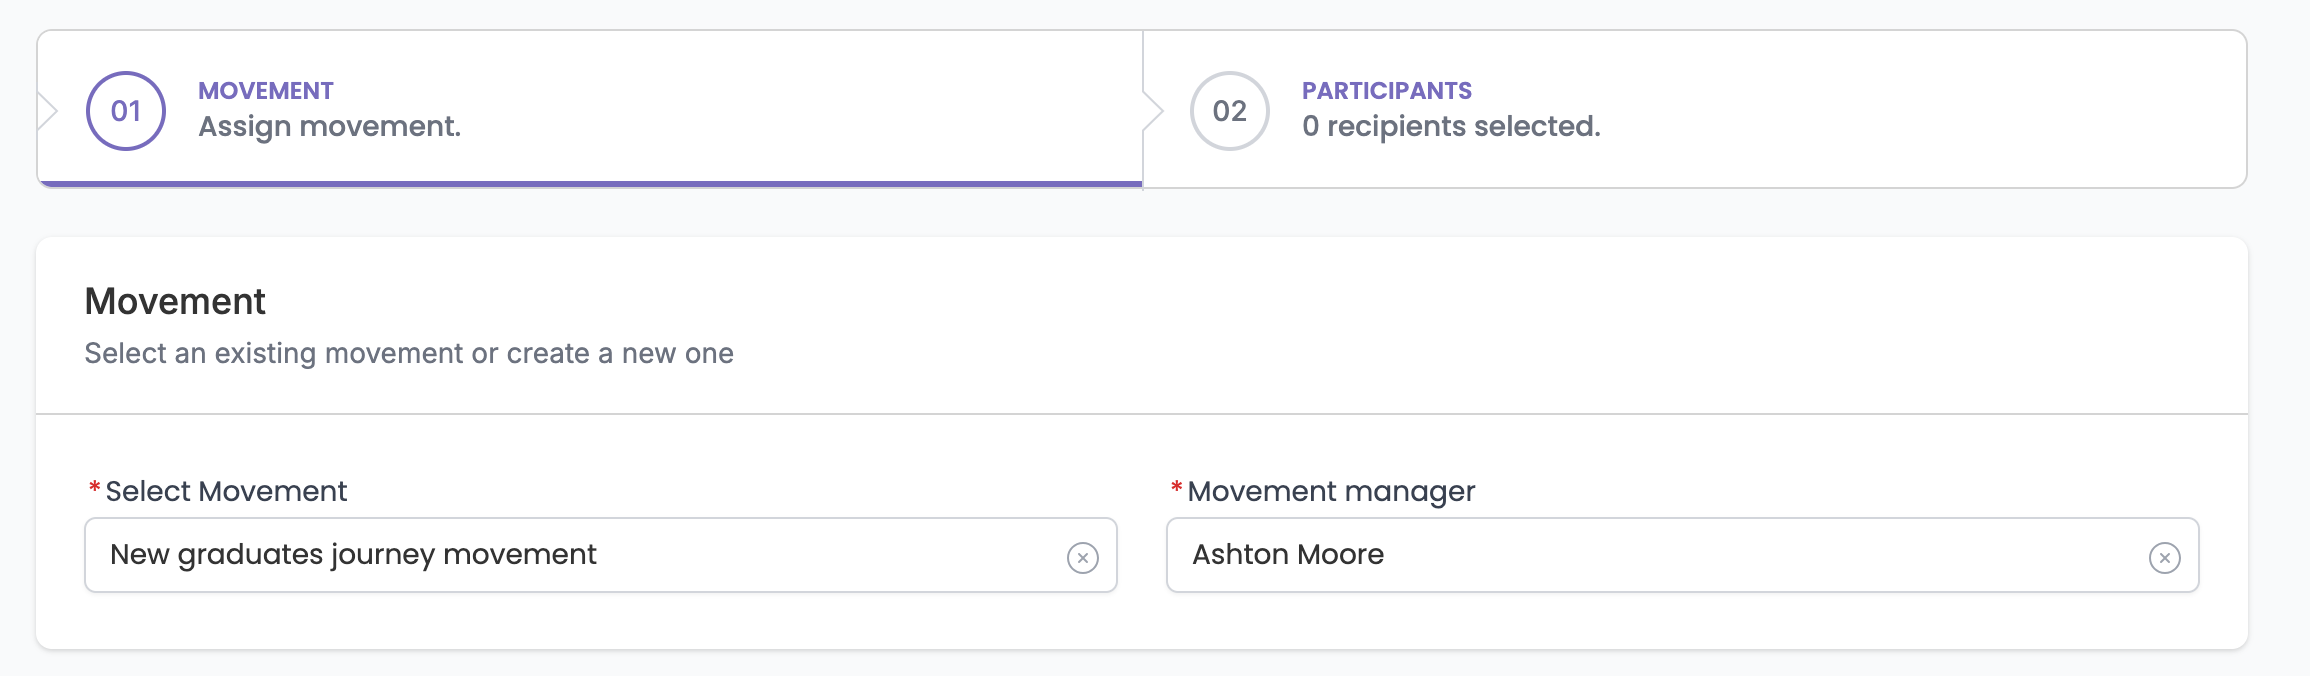
- Select a movement from your list of published movements. Alternatively, you can click ‘Create new’ to start creating a new movement.
- Select a movement manager to oversee the movement.
- Next up is scheduling the movement. Enter a start date for your movement.
- Enter an end date for your movement.
- Review the automations that will run during this movement.
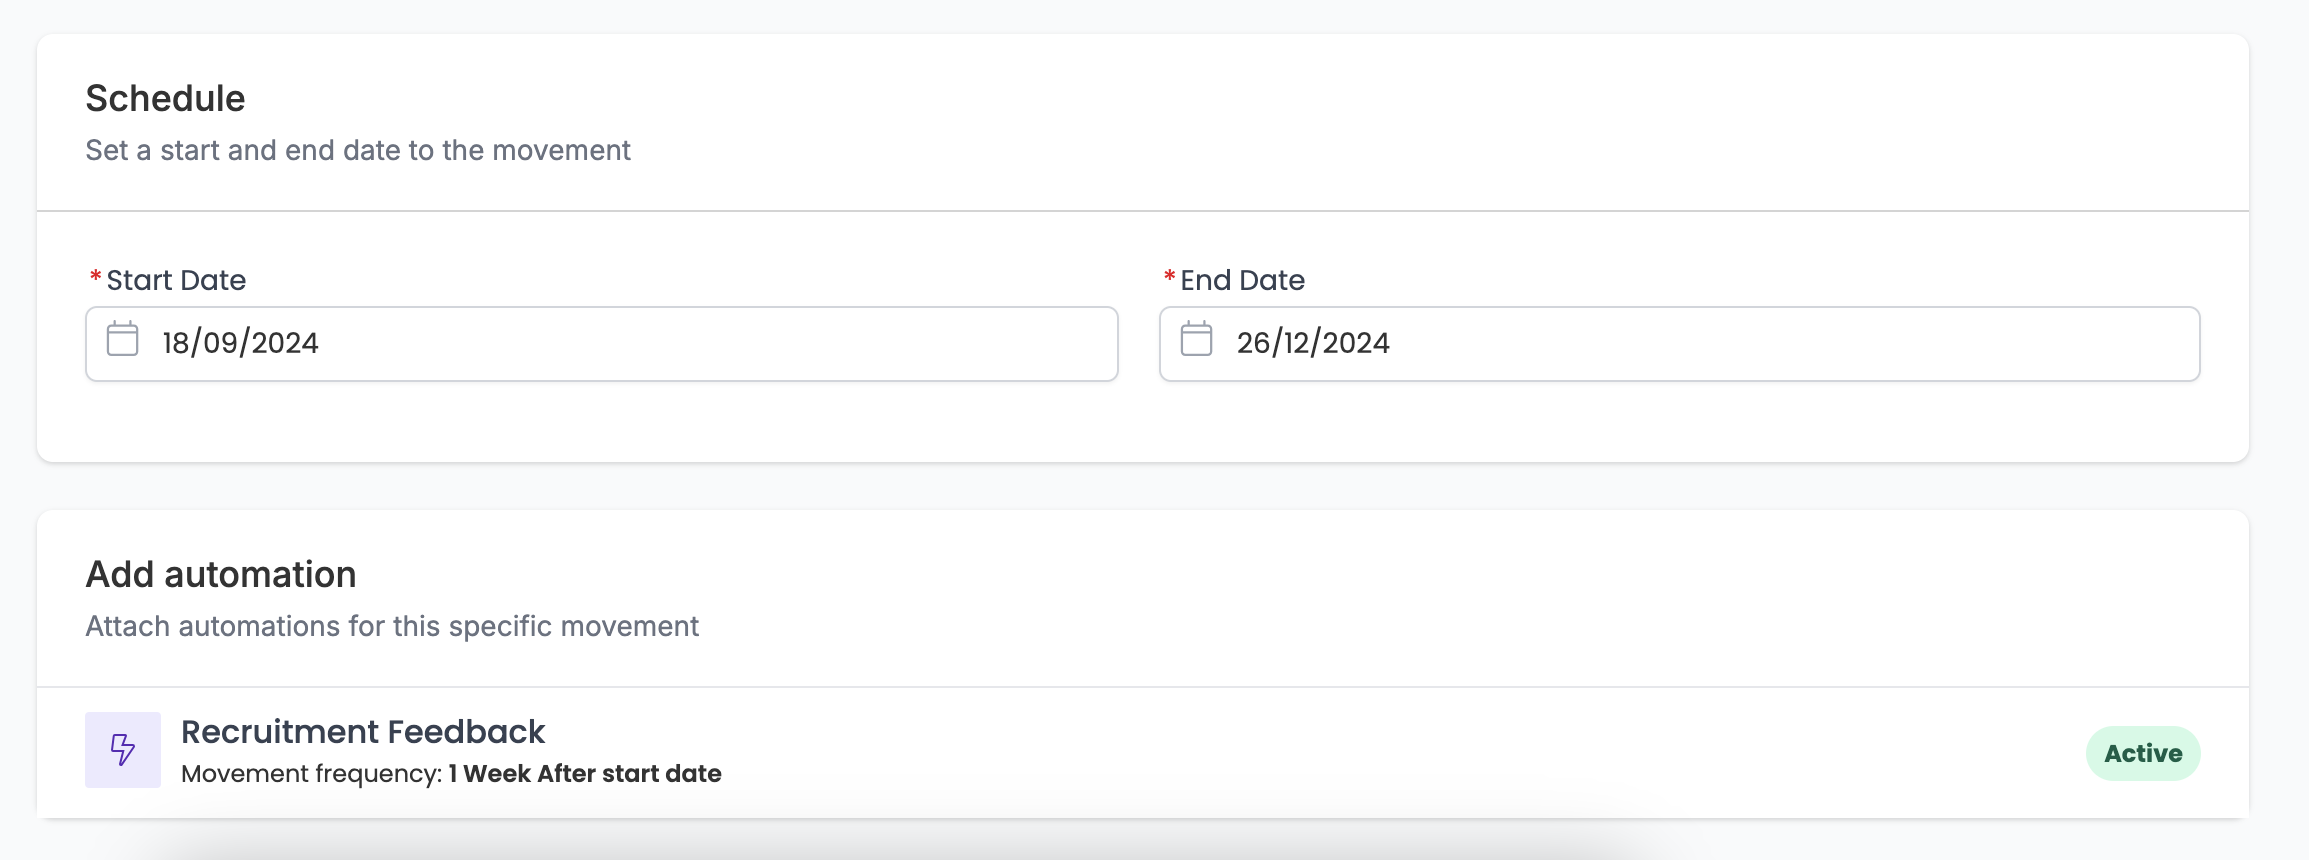
ℹ️ If you need to make any adjustments to your automations (such as the frequency), open the attached automation and edit the settings within there by clicking the dropdown arrow next to ‘Edit Participants’.

- It’s time to add the participants to the movement, at the top of the page — click the ‘02 Participants’ tab.

- Select participants to be added to the movement by clicking the box to the left of their name.
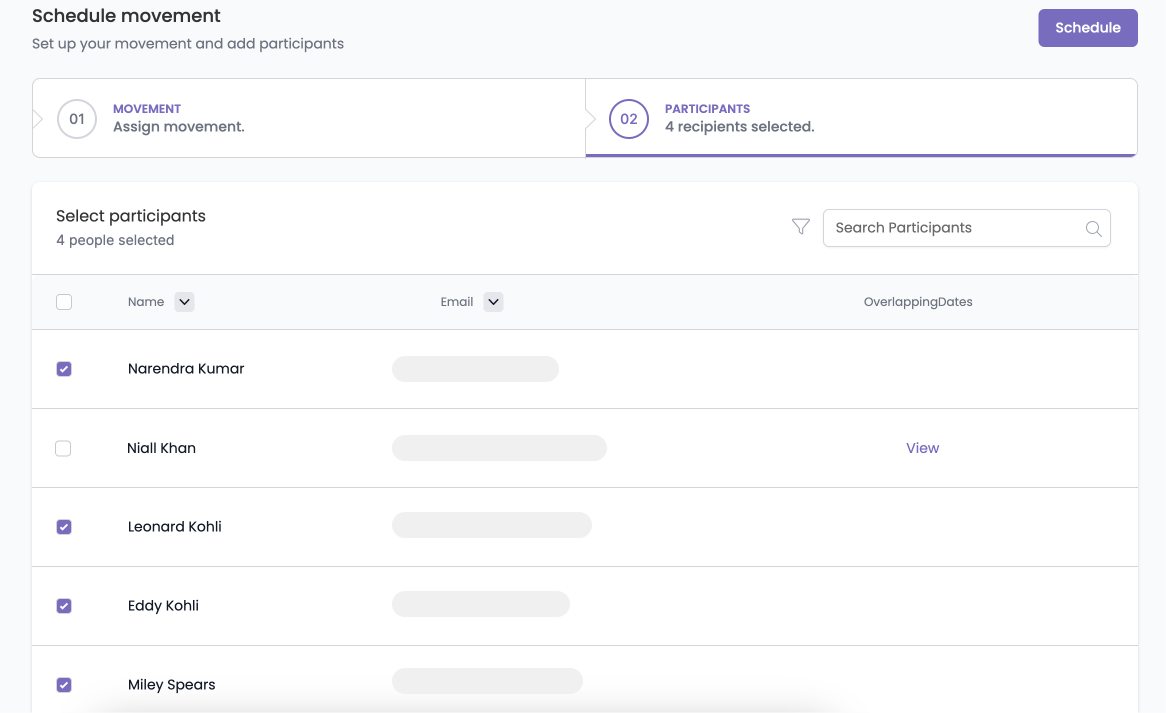
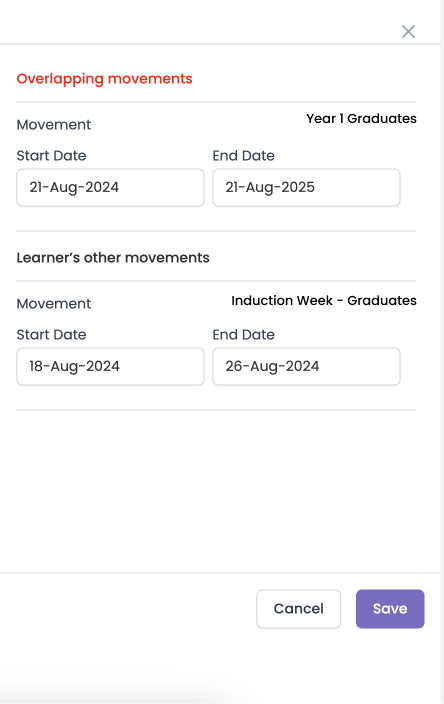
You can see if there are learners with overlapping movement dates on the ‘Overlapping dates’ column. Click ‘View’ for a slideover of conflicting dates.
- Once you are happy with the participants selected, click ‘Schedule' at the top right

- A message will appear stating that the movement has been scheduled successfully.
- The movement will be updated with the ongoing participants.
ℹ️ Your participants will be listed once the movement begins. If the movement hasn't started yet, the participant count will remain hidden until the start date.

Related Articles
| Viewing a movement | View article |
| Deactivating or deleting a movement | View article |
| Creating a movement | View article |